Where does the time go?

Where does the time go? If you have a toddler it goes on entertaining them, trying to catch up on sleep or, if like me, they are spending their first winter season in nursery, permanently unwell. That’s my excuse and I’m sticking to it. 

Nonetheless it should be pretty clear from that intro that it’s been a slow few months. I can’t blame it all on the little one, a combination of boring jobs (read painting, or worse prepping!) and overthinking the planning mean that not a lot has been getting done. I am here now though so let me catch you up. 

The next few months are spent tackling a couple of things people who have built Exocets say:

  1. When fitting the floor make sure you don’t rivet where the seats are going to mount
  2. It’s a lot easier to fit the tunnel and firewall before you fit the floor

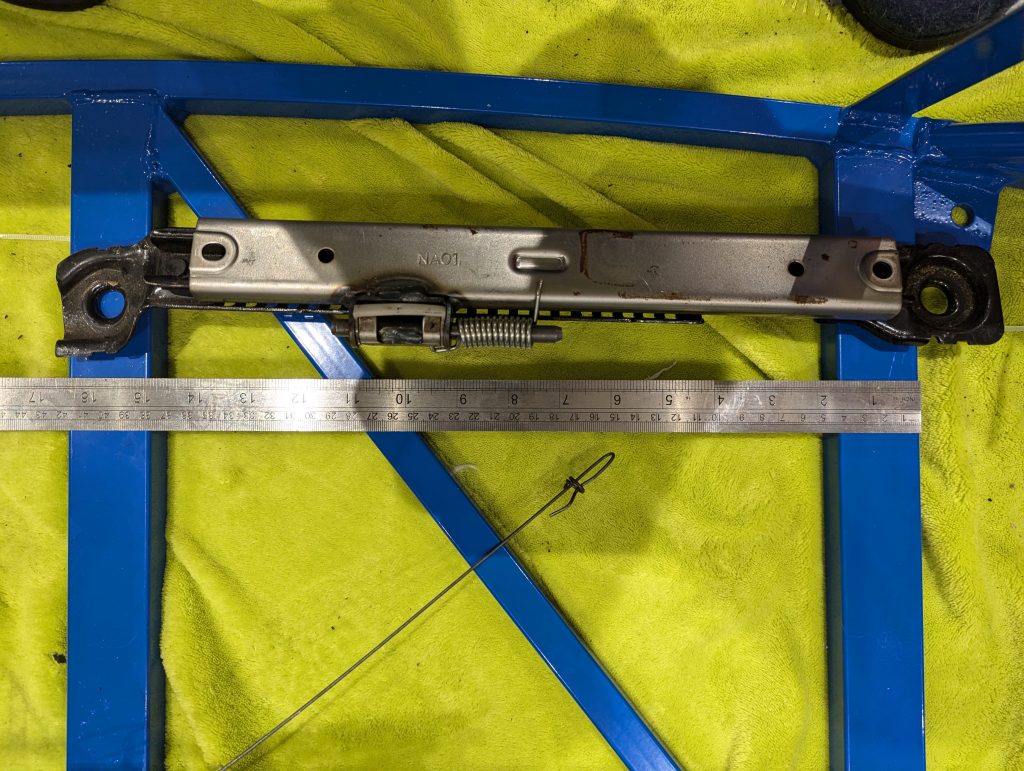
So before starting on the floor I decided to check where exactly the seats would be mounting, so started somewhat unusually with the seat rails. As in the build guide I trimmed the edge, bent the ends flat and offered them up to the car. Then I hit my first “it’s a kit car” moment, the holes on the rails didn’t line up. I spent a little time thinking about it, popped a message on the Facebook group but nothing really came of it so I decided that a) I’d roughly be able to guess where the holes would be needed and b) anything more I can worry about later. So back into the corner of the garage went the seat rails. 

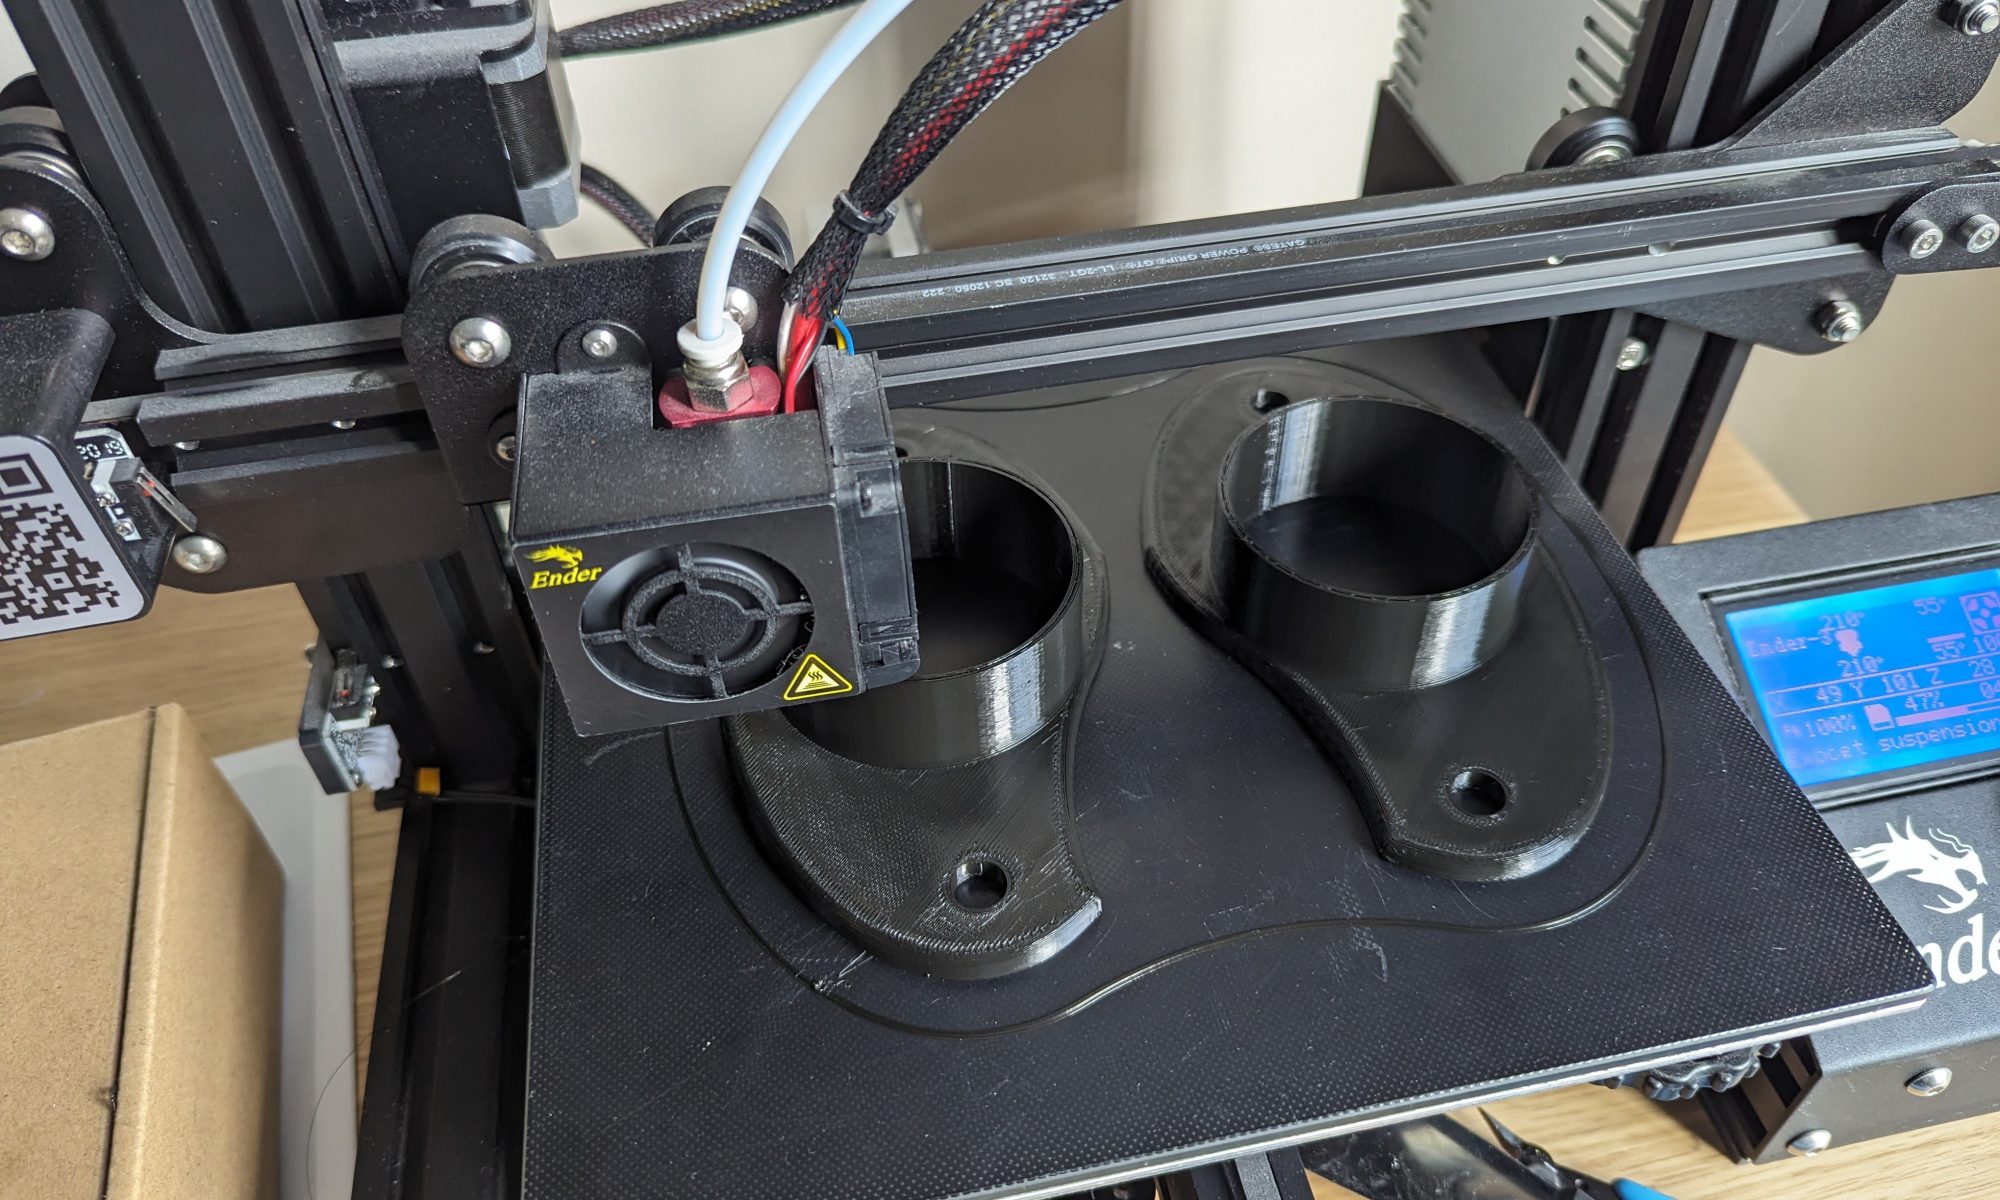
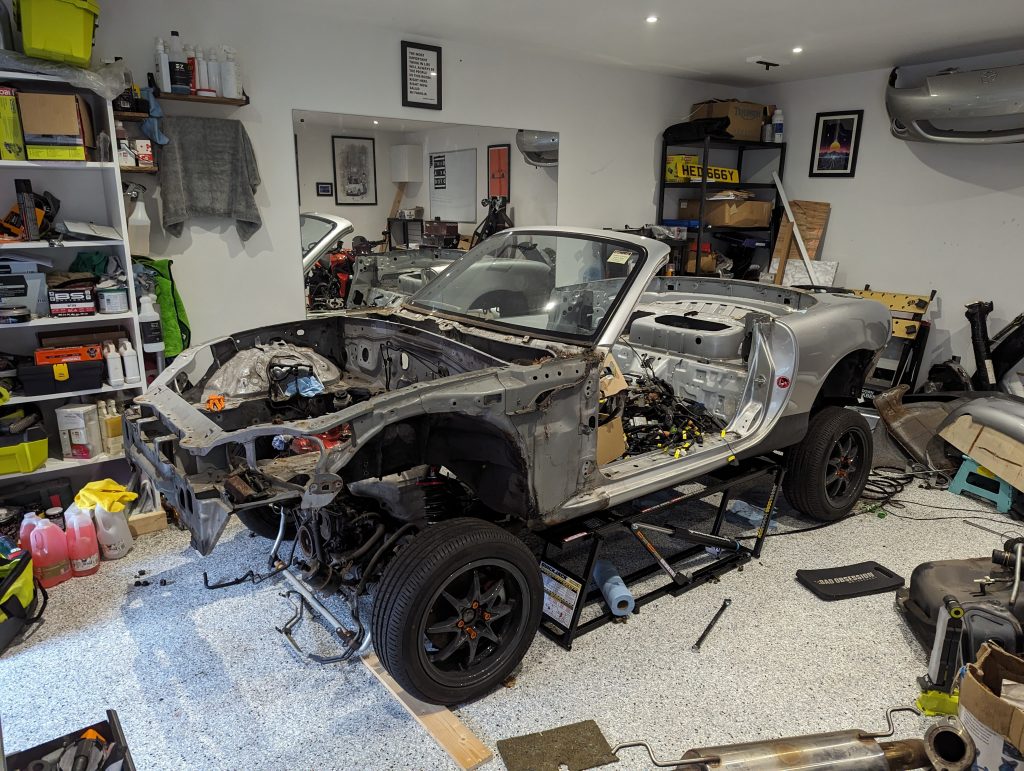
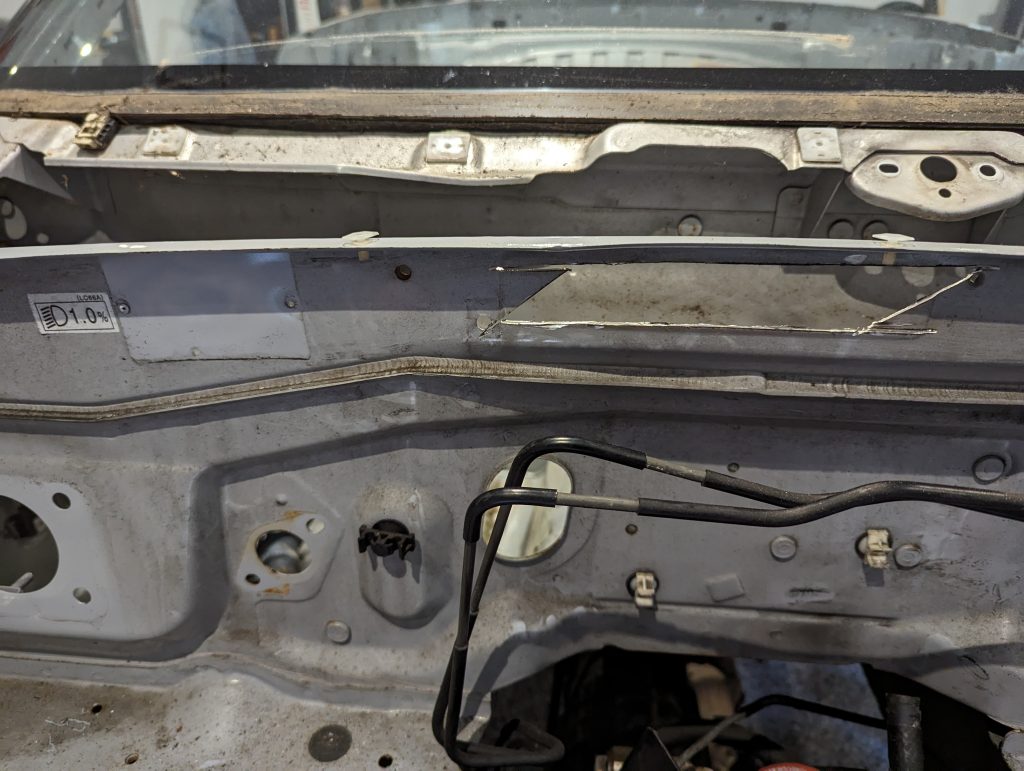
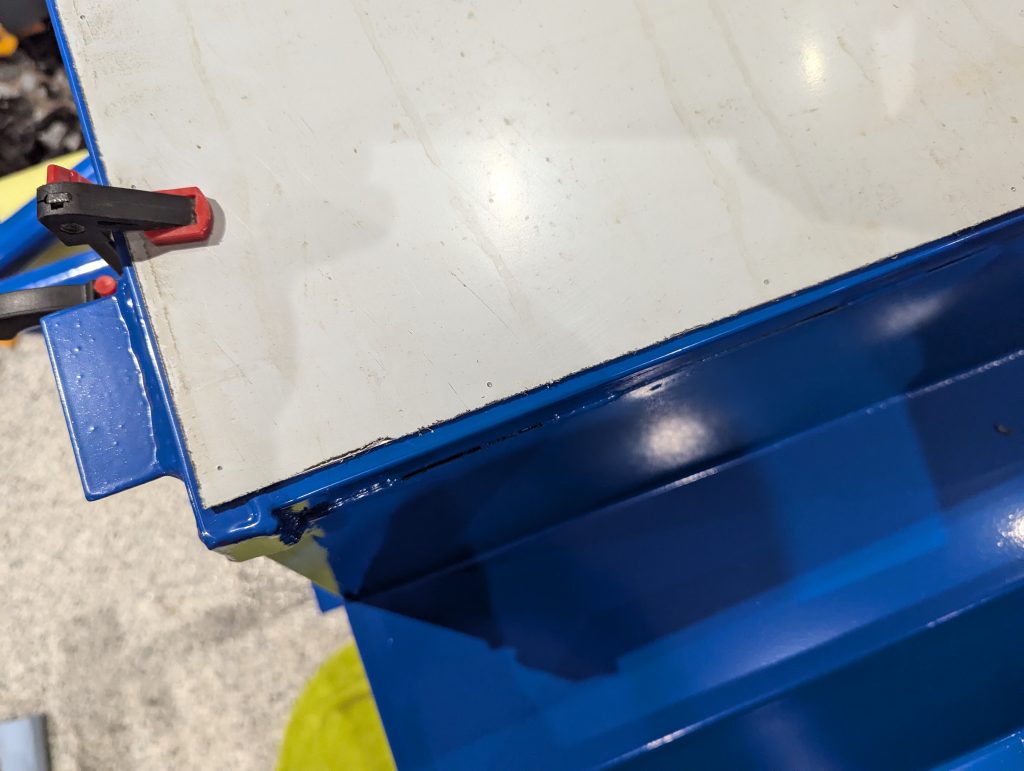
On to the floor, pun intended. I started by clamping the floor to the frame and seeing what was what. I noticed that the cut wasn’t perfect all the way around, nothing major but where there was a little excess material I decided to cut this away. Then with the floor clamped in place and a small template made on the 3d printer to mark a hole every 100mm I set about punching then drilling holes for the rivets. 

Lesson for future builders – as you drill holes, drop a rivet in to keep the floor stable, it is entirely possible for the floor to move slightly part way around drilling regardless of how many clamps you use. 

Despite that slight hiccup the holes were all drilled in the aluminium and the frame, I used a touch up paint of the blue RAL colour to paint the holes for a slight extra bit of rust protection. Probably pointless but easy too. 

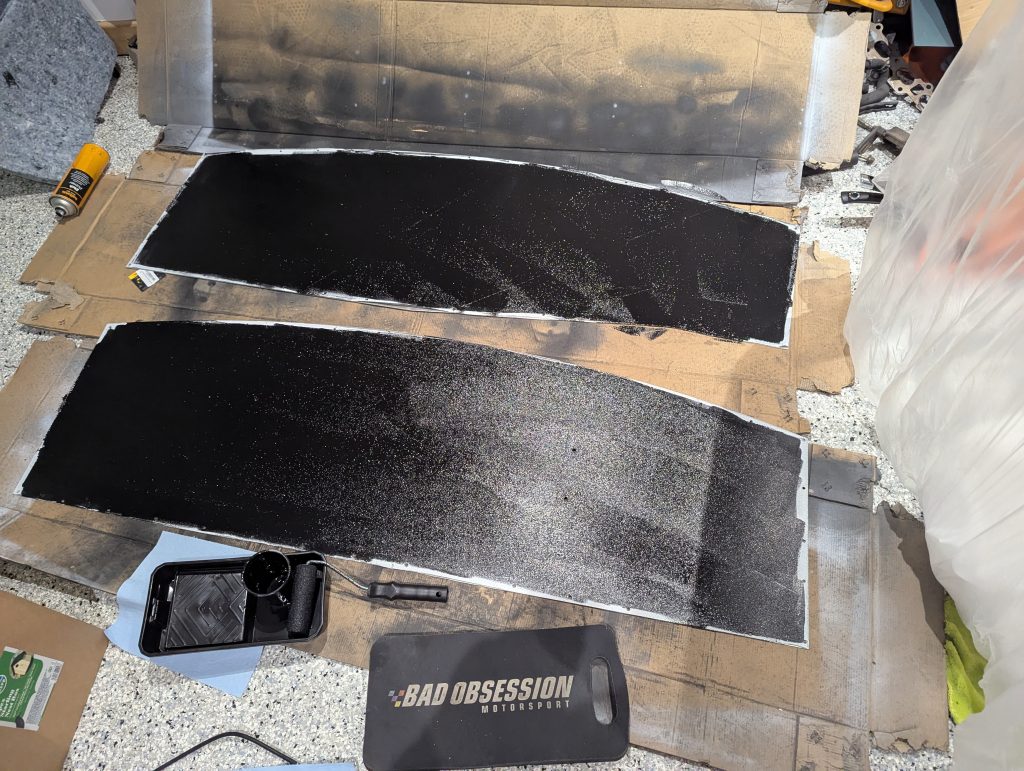
I decided it was worth treating/painting/wrapping the floor before fitting. I used Upol Raptor truck bed liner as the covering for the top of the floor, and just some Hammerite Stone Chip paint on the bottom. On the top I wanted to keep clean metal where I would be using adhesive to ensure a good solid connection to the frame so I laid the floor on the frame, marked out where the edges were and cut out the covering that came on the aluminium to easily mask of that area. I’m happy to say it was quite successful. The bed liner paint is a two part mix so I used around a third of each amount, poured it onto the metal and brushed it around with a small paint roller. The thick coat and the paint roller gave a slightly textured finish that I like and should help in the cockpit. 

By the way, if anyone knows where I can get the words “I f**ked up, please turn over” made up in a large vinyl sticker do let me know.

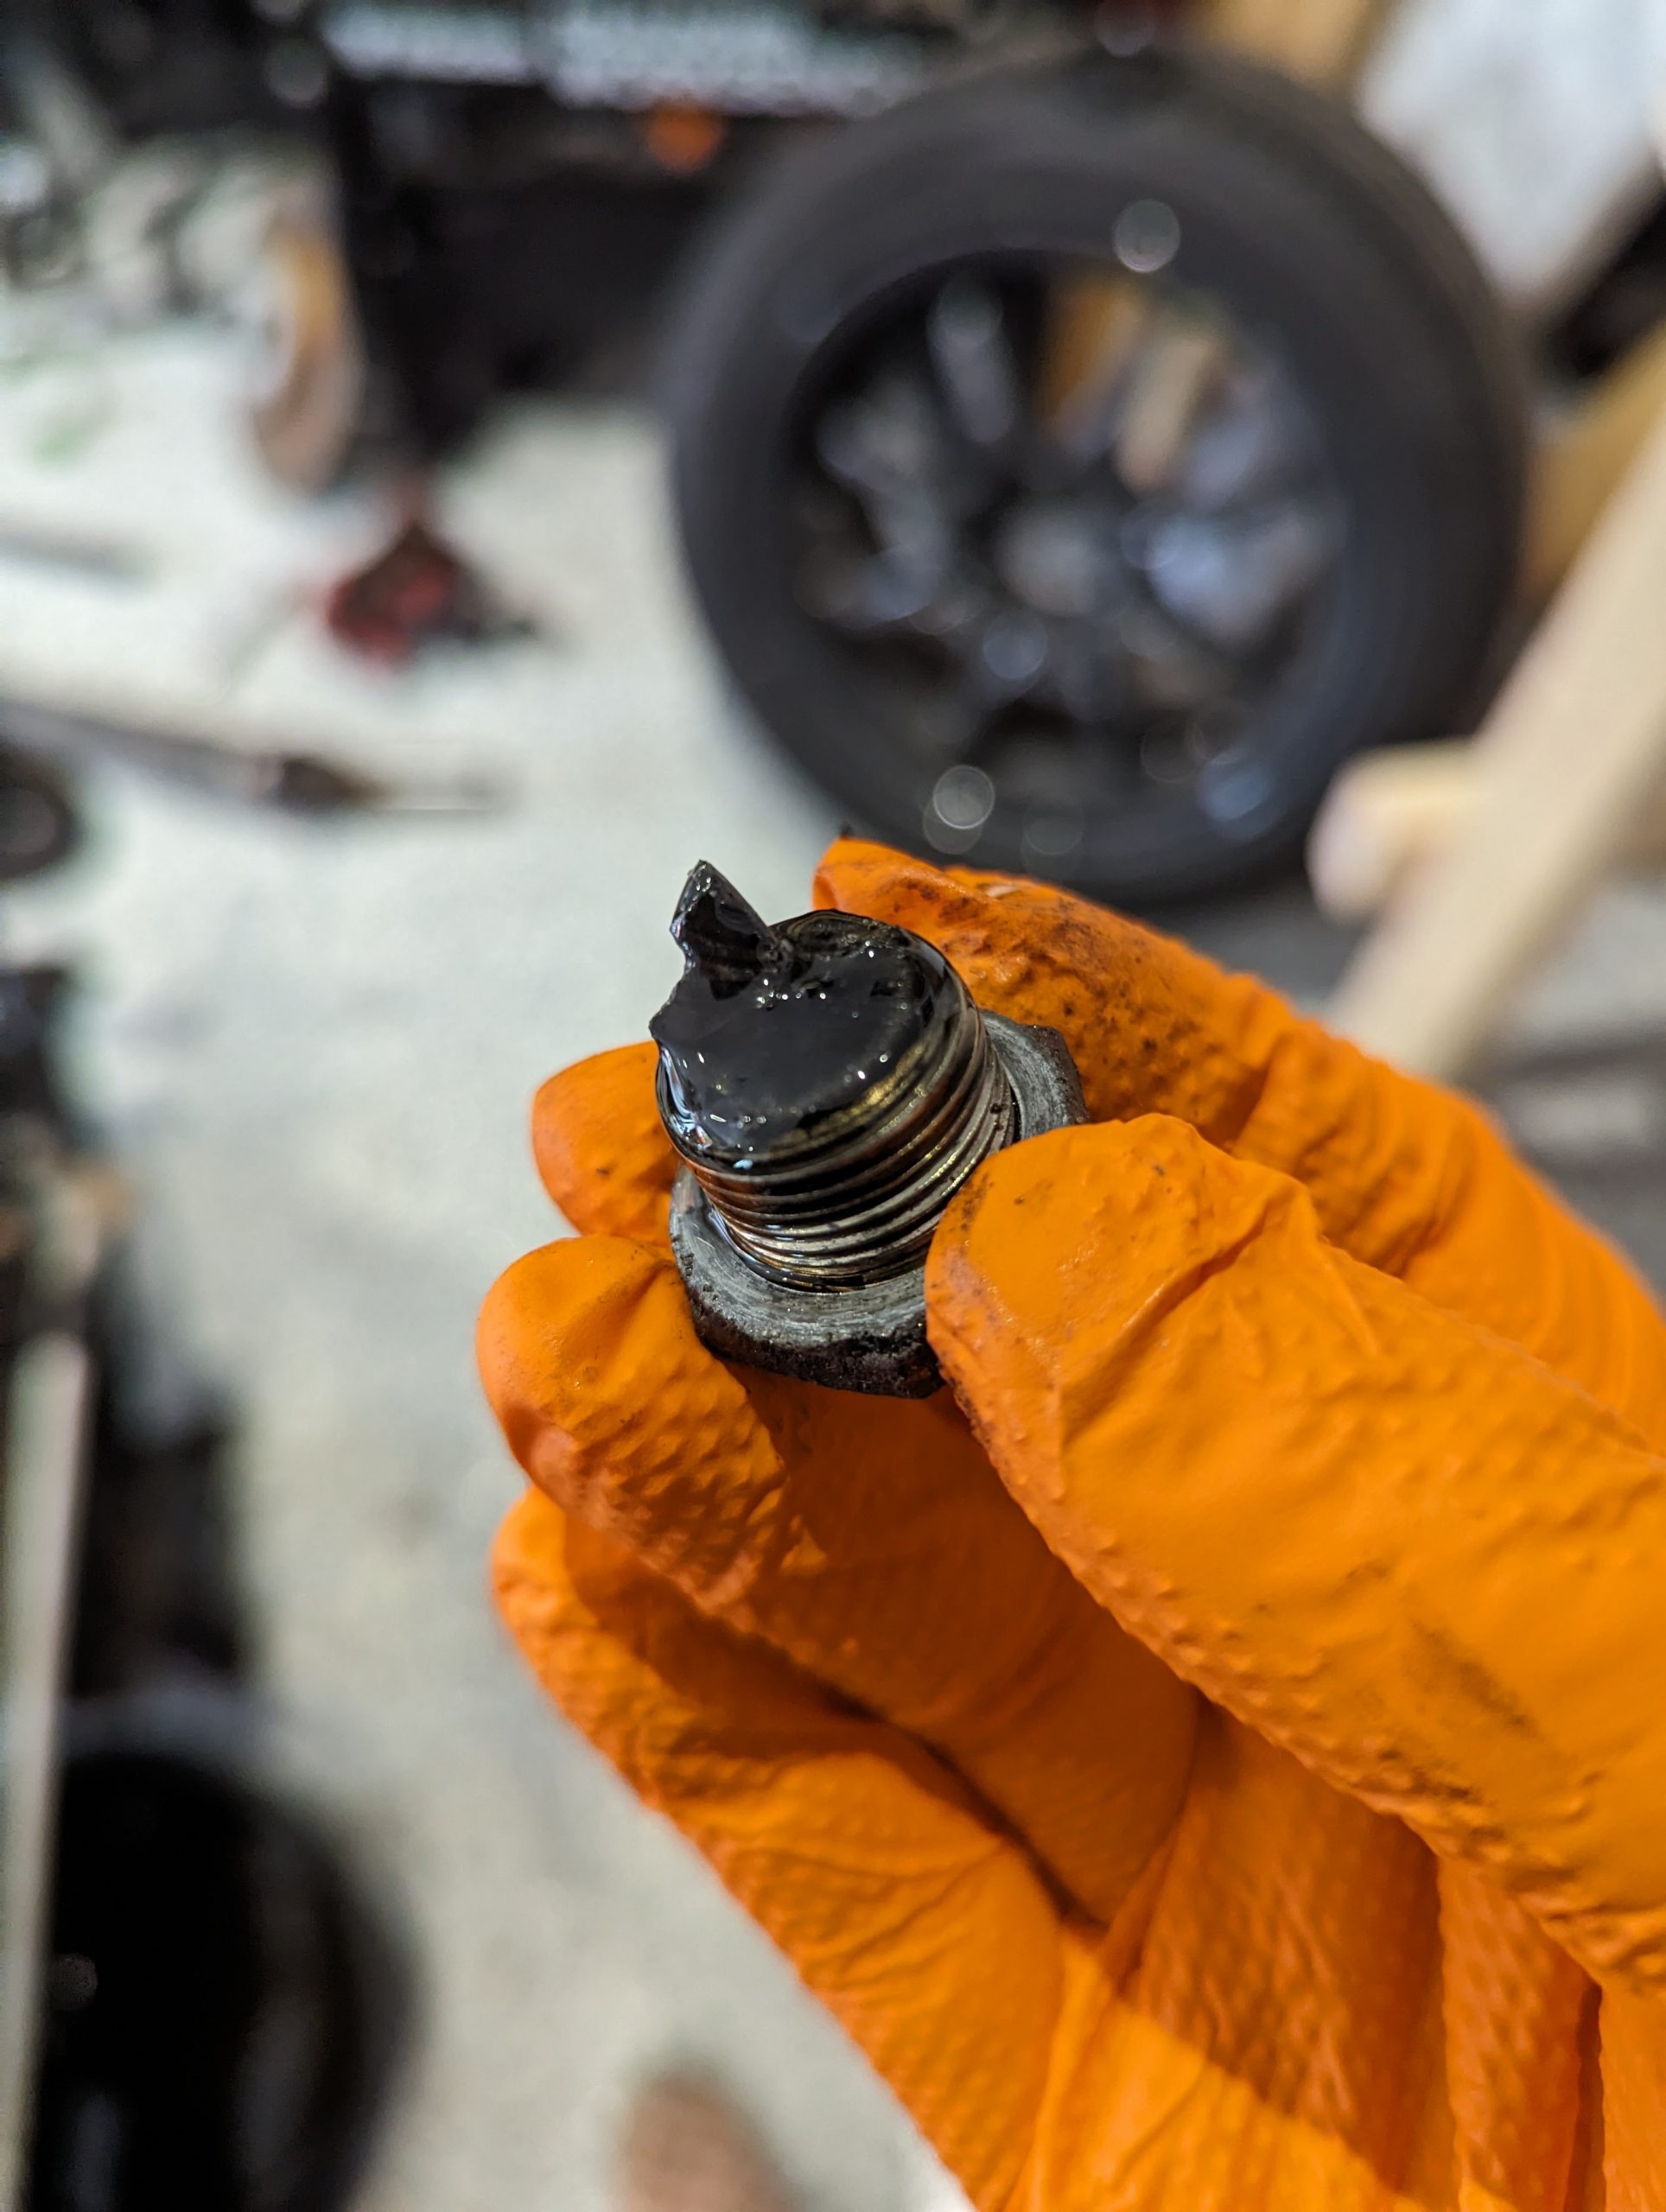
While all of this was going on I was tinkering with other things, I made up another cover for the engine on the 3d printer, this time for the oil filter/coolant sandwich plate thread. Ultimately I will get round to giving the block a quick coat of enamel just to tidy it. I also organised some bolts that I might be able to reuse – lots of M6x16 on a MX5 apparently. 

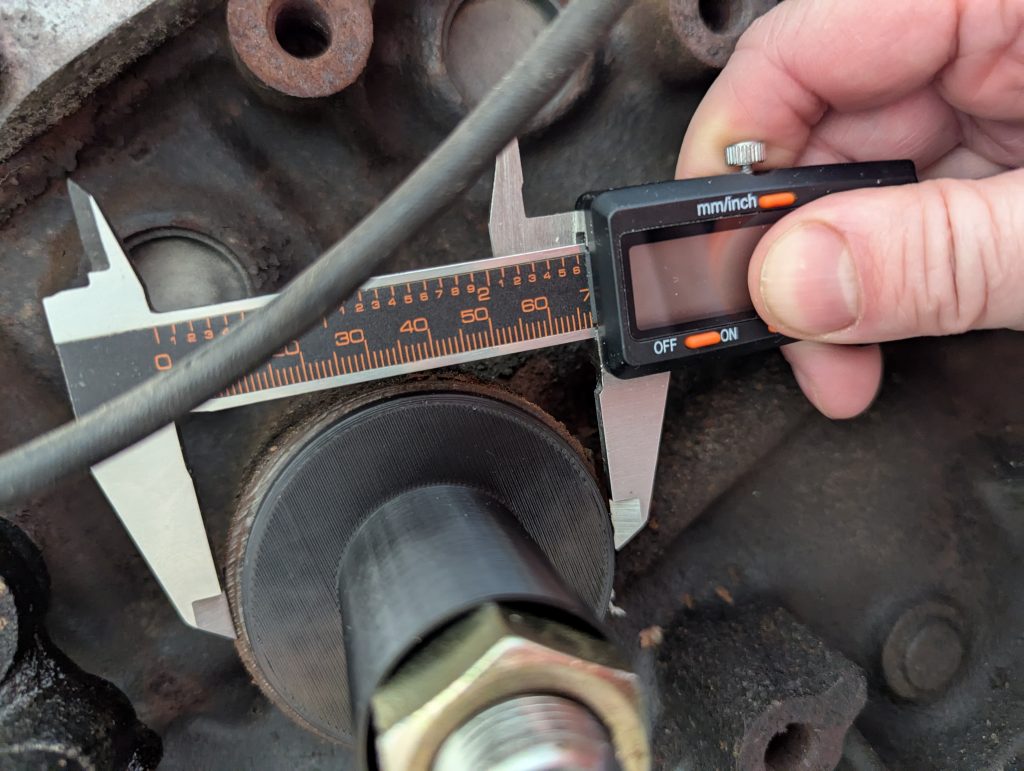
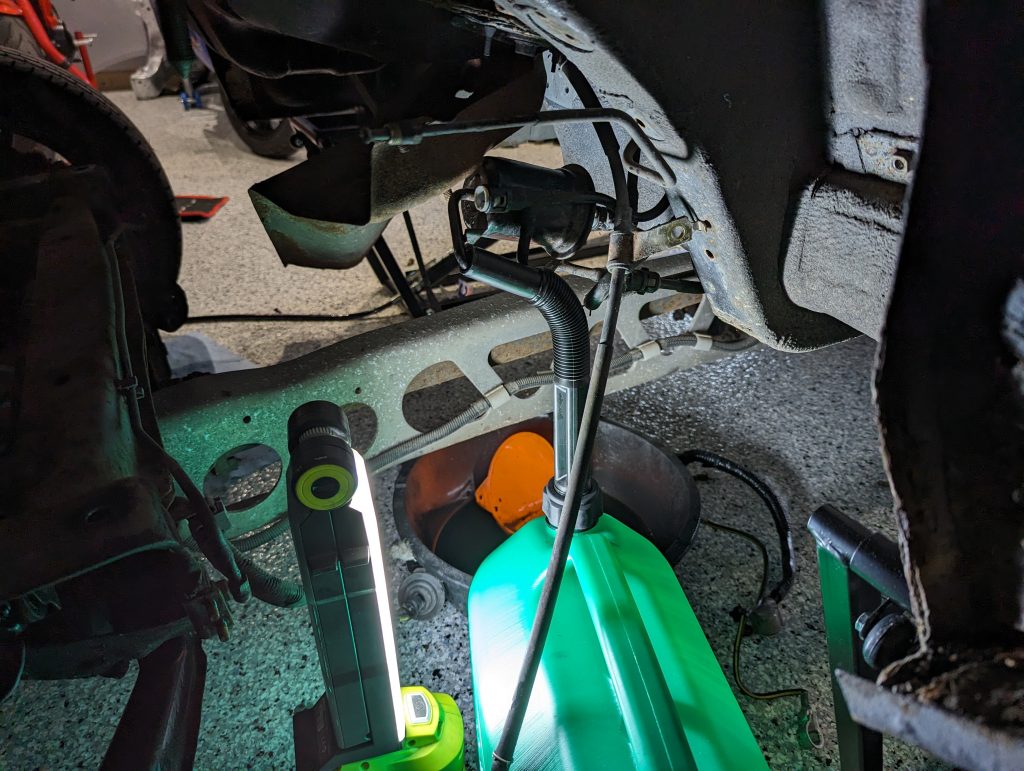
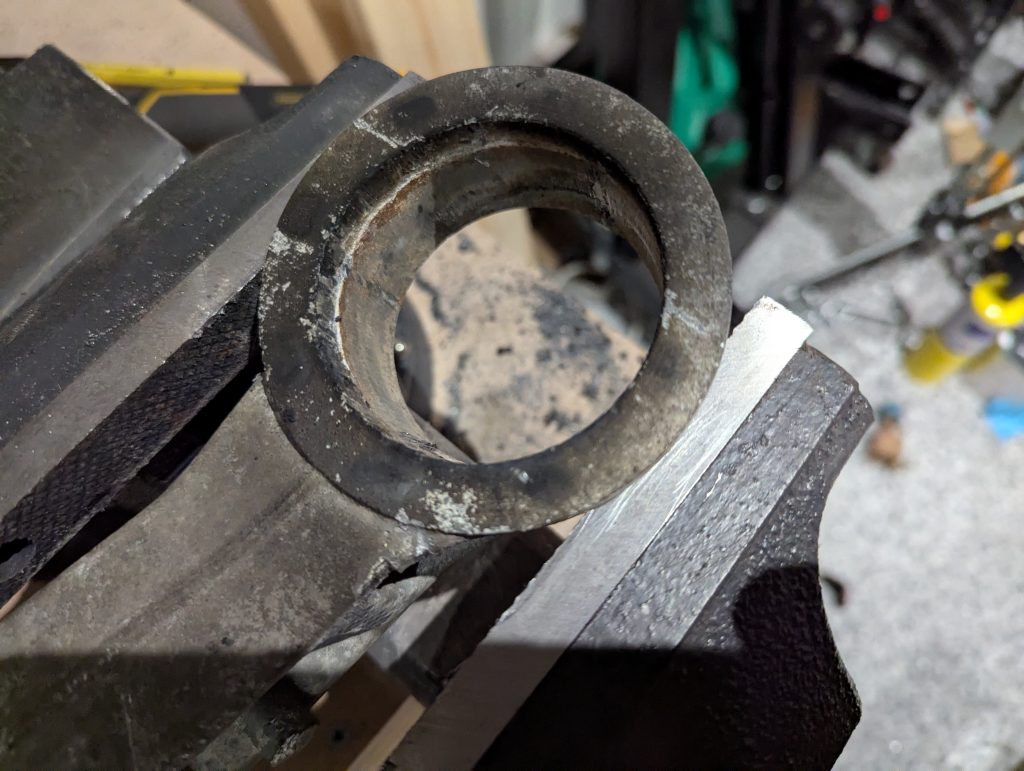
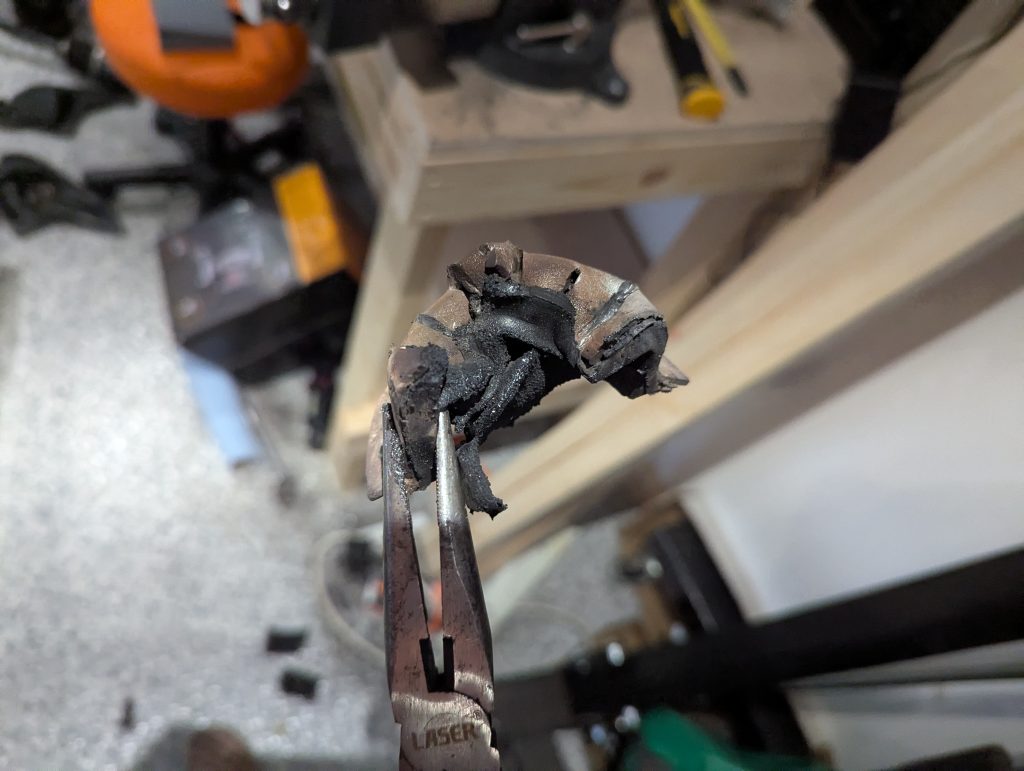
By far my nemesis over this time (apart from the cold weather preventing any painting getting done) was the diff bushes. I can’t adequately describe my process or indeed my feelings about the process without using a significant number of expletives. Suffice to say it took over 3 months, a new lump hammer, a new set of chisels, a new blowtorch, more bashed thumbs than I have fingers, skinned knuckles, burning rubber fumes and a couple of chips in the housing that will need polishing out in order to get those metal and rubber pieces of *********** out of the case. The first photo here is from the 9th November, the first bushing parted ways with the diff case on the 15th March. 

One last thing then since I did mention it at the start, I spent a good amount of time deciding whether or not to fit the floor. On the one hand if I leave the floor off it will (or so people on the forum would have me believe) make fitting the tunnel and firewall easier. On the other, fitting the floor means once that’s done I can turn the frame over and fit to the skate (when it’s ready) only once, not having to turn it back again to fit the floor. I’ll save the answer for the next post but it’s a good example of me getting stuck on a decision so long that it was more counter-productive than either of the negative outcomes would have been anyway. One day I’ll learn just to pick one. 

And I think that’s about caught up for now. 

The day I’ve been waiting for

With a title like that it better be a good post right? 

Well, after a lot of unfortunate setbacks at MEV with the chassis being built the day finally came where it was collected from the powder coaters and I got the message it was ready for me. Unfortunately I have been so busy at work that I couldn’t find time to go and get the kit and so Stewart was able to deliver it down to the Basingstoke (for a fee). I am disappointed I didn’t get to see MEV HQ and will make sure I pop by when I’m anywhere near the area in future. 

At just after 9am while I was standing in the driveway waiting like an excited school boy, a van pulls up with the registration BO55 EXO and a coffee fueled Stewart at the wheel. On opening the back up the same thing kept playing over in my head, “that colour combo is exactly what I wanted it to be”. We got it all unloaded into the garage, with only a couple of bits to follows for later in the build (flyscreens and braided lines), chatted for a good 20 minutes as you do, and Stewart headed off back to MEV HQ. Working from home that day there may have been a few trips to the garage during coffee breaks to have a cheeky look at it. At the end of the day I went back and started adding some protection to the chassis ready to start work. 

148 days of waiting and it’s finally here in all it’s glory ready for all the work that lies ahead, the excitement alone feels worth the wait. 

*FYI the orange colour is RAL 2004 pure orange, while the blue is RAL 5017 traffic blue. 

Bits and pieces part 2

A couple more odds and sods done over the summer now.

First I decided to do a bit of a strip of the engine. Not intending too much here as I had myself done a cambelt and water pump change a few years ago now but not many miles ago. However once you start there is a temptation to just add an oil return to the sump for a turbo, maybe clean the head of all the carbon, and if the head and sump are off could put some forged rods in since they’re the weakpoint of the engine, and if doing rods might as well do bearings…. You can see how it’s easy to get carried away. For now the plan is just to clean up and paint the block as well as fit a new clutch. 

Next up is some more playing with the 3d printer. 

The first is out of a nervousness with all those open ports on the head so I designed and printed some covers which could be bolted loosely in place of the manifolds. They’ll also be useful when it comes to wire brushing and painting the block. 

The second is just to add some personalisation to the car through the instrument cluster. These are still a work in progress but thought I would add some gauge rings to match some of the elements of the car. 

Lastly a bit more cleaning and painting, this time the ppf and rear subframe. 

Bits and pieces part 1

Some smaller jobs achieved over the summer. Firstly I managed to install the front subframe which has been acid dipped and galvanised (it was a good deal, saves money in the long run really). Given the way things are going it may have to get painted black…

Getting the diff and ppf apart was plenty fun. Suffice to say that the captive nuts and series of pressed tubes through which the diff was bolted to the ppf made for an entertaining challenge. Nevertheless some calm perseverence meant that nothing needed to get broken, cut or drilled out so I’m happy. 

I started to refurb some of the components that haven’t yet been dealt with starting with the prop shaft which got a good wire brushing followed by a coat of rust converter to catch the last bits that were lingering, then primer and black top coat. 

Next job I tackled was mentioned in the previous post, my diff is a Fuji style diff which is great but also has some weaknesses and it appears mine has started to suffer. There is a company in Northern Ireland which has developed a repair for these that is well reviewed and tested and is good value compared to the cost of a replacement, so in order to send it off the diff had to be split.

Once this was done and sent away, I started trying to disassemble the steering rack. Originally hoping to keep the power steering, the effort with which the pipes wanted to stay attached to the rack was quickly changing my mind. That coupled with some friends with depowered racks singing their praises has for the time being swayed my decision, so by the end some of the pipes were cut in order to get a ring spanner on them and managed to get them all removed. 

I also wanted to remove the abs sensors (in some cases needed to in order to fit the wingstays). And another fight ensued, this time it was very much a fight to the death and while I was eventually victorious it was left hollow (or not as the case may be) by the broken off bolt that remained stuck in the hub assembly. That will need drilling out but that’s future Ben’s problem.

Next up some goodies for my local powder coater. 

Since the Exocet is designed to use the factory suspension and sit at an appropriate sports car height, aftermarket suspension that is designed to lower the original MX5 chassis to a more sporty ride height tends to make the Exocet chassis sit to low, or require enough adjustment that it affects the functionality. G19 engineering have created a solution by designing spacers to sit between the top of the shocks and the chassis. I ordered a set and these were dropped into the box for the powder coaters (to match the chassis colour). 

I also stripped the rear subframe to send off as well, although in this case I requested just to get it blasted and paint it myself both to save a few pennies and in case any modifications/welding are needed down the road (e.g. for exhaust hangers?)

And for good measure a spare cam cover and set of brake calipers and carriers were also added to the powder coating box (this time to be done in the body colour)

Tony Hawk I ain’t

Time to start work on the skate (see what I did there?)

There are a number of jobs I had cobbled together into something you might call a list in my head:

  • My understanding was that it is easiest to remove the rear hubs on the mk2.5 so you can remove the brake shields, the ABS rings (unless you’re keeping it) and drill the hole for the wing stays (this understanding turned out to be entirely incorrect – see below)
  • I had acquired for a sensible price (from none other than rocketeer) an acid dipped and galvanised front subframe which needs swapping in
  • With a galvanised front and having already powder coated the wishbones, it makes sense to get the rear subframe blasted and coated too while it’s accessible
  • Power steering needed refurbing and possibly depowering
  • New clutch
  • General cleaning and tidying

The engine itself has had a good service less than 20k miles ago by me (cam belt, water pump, seals, plugs etc) so while a general tidy may be done it’s not needed. I also plan to turbo at some point in the near future so it may be worth doing some work while it’s out or conversely not doing the work since I can do it when the turbo is fitted… jury’s still out. 

I started by pulling the gearbox since the clutch needed changing and the engine needed to come off to swap the subframes. Oil drained, prop shaft removed, PPF disconnected from the gearbox, slave cylinder and started motor disconnected, then a handful of gearbox bolts and it pulled free. Piece of cake. 

I’d jumped back and forward between the front (above) and the back of the skate. At the rear end I have removed the brakes, undone the hub bolts and been alternating between spraying copious amounts of penetrating fluid and mercilessly hitting the bloody thing with a hammer to try and remove the hubs. After at least half a week of this (and one incident with a slight diversion of the hammers trajectory towards my unsuspecting thumb), I decided it wasn’t worth it and another way would be found. 

And found it was. I pontificated on the problem and decided that while the hammer had indeed wronged me, that with the addition of a small chisel could do even more damage, or better yet tap a splice in the thin metal of the brake shield. And that’s exactly what it did. With that, and a bit of brute force bending it to get it off around the drive shaft, both sides were soon removed. 

A similar process was applied to the abs ring, but alas these were a bit more tough. The rotary tool with a small cutting disk so as not to nick the upright was successful however. No bending this time so two cuts were made, one either side of the ring, and the two pieces fell off. 

I’d also removed the oil from the rear differential.

Bear with me with the technical jargon here. The donor car is a mk2.5 MX5 sport and as such has the Fuji differential. These are good limited slip differentials when they work but suffer from a fatal weakness, the clutch plates that they use are prone to… what’s an appropriate descriptor… shattering. Exploding would probably be a bit too dramatic.

I guess by now you can see where this is going… the diff has a magnetic drain plug which when I removed it to empty it of the oil, found this, a big piece of clutch plate. While not the end of the world, I have seen much worse, it made me thinking about bringing forward the longer term plan. Knowing the weakness in these diffs I have heard about an engineering company in Ireland who have come up with a novel fix for them, just send the diff off to them and they’ll send it back working again, and for a reasonable price. 

After all that I managed to remove the remainder of the suspension from the rear end, leaving the subframe ready to send off to the powder coaters, as well as getting the engine removed from the front end and onto an engine stand. 

Printing a car

While the donor car has been being dismantled and organised, I have had the opportunity to meet up with a fellow Exocet builder in Basingstoke. He has a lovely red chassis based on the same model as my own, so understandably he’s had to answer many many model specific questions from yours truly. 

He is very much at the other end of the journey to me, with his car almost ready to be on the road. There are lots of little quirks of the IVA (individual vehicle approval) rules but one such is that, aside from a few exceptions, you can’t have sharp bits. I know, picky aren’t they. But they have a strict definition which is that anything contactable (again specific definition but I’ll spare you) must have a radius of at least 2.5mm. One area that falls foul of this on the Exocet is the top of the rear suspension. So when I was told that that was something that still needed figuring out, I decide that I would repay all the patient question answering with a solution (and it would be really fun for me – no really, I like that sort of thing). So I took some measurements and said I’d be back the following week. 

I went home and CAD up a simple design to fit the purpose, loaded it onto the 3d printer and printed out a clever little (if I do say so myself) mount for the top of the suspension. The excitement to try it out when I returned the following week was too much, would it even work? Of course… not. I’d measured wrong and the piece was just slightly too short to fit. And that was the first of a handful of iterations. 

The second iteration fit, but when we torqued up the nuts to secure it (it used the same nuts as the suspension and you don’t want that falling off) the cover split, the plastic wasn’t strong enough, even where I’d specially printed it solid hoping it would withstand the pressure. 

A couple more weeks at the drawing board trying to decide the best solution. 

The third iteration had a larger hole to fit over the suspension nuts, thus not relying on them, then a smaller hole and a plastic nut to then hold the cover on. Having not learned my lesson the first time and guessed at the measurements I was way out and yet again it didn’t fit. Though it looked like the principle could be sound. 

One more time then with some more measurements and… Eureka! The thing fit even better than I could’ve hoped. The nuts were snug, I’d added a taper to the nuts and the top of the holes to give a better fit. Everything lined up perfectly. 

In the end, it was a fun problem to solve, and given how well it turned out, I definitely banked a few more favours for the many many specific questions I’ll get through my build. 

Highlights of Iceland

Five days is all it takes to fall in love with a country, when that country is Iceland…

Here’s why:

#1 The Golden Circle (Thingvellir, Geysir, Gullfoss)

One of the most popular tourist attraction in Iceland, but that doesn’t mean it loses any of it’s appeal. The golden circle describes a particular tourist route/road that takes you to 3 major sights. There are lots of tour companies that do the route or you can hire a car and go your own way. We went with the large local tour operator (and airport transfer company) Reykjavik Excursions.

Our first stop was Thingvellir (spelled Þingvellir – that’s the letter Thorn), a national park founded to protect the site of Iceland’s first parliament, but includes a significant site of the boundary of the American and Eurasian tectonic plates. You see clearly visible the crack in the Earth where the plates meet. It is also located just north of the largest natural lake in Iceland.  

Next was Geysir, the site of natural hot (200 degrees celcius) spring and geyser that erupts about every 10 minutes. 

Lastly for the Golden Circle was the Gullfoss waterfall, an awesome feat of nature and a beautiful sight. 

#2 The water

The water in Iceland is natural volcanic rock filtered water. The stuff in the tap is basically Volvic, and it tastes great, which is lucky since a beer in Iceland will set you back around £8, or $10, so you’ll be drinking plenty of water. 

Also of interest and related to the water is the energy usage in Iceland. Almost 100% of Iceland energy is renewable. This is largely because of their significant geothermal energy resource. Most houses in Iceland are heated just by taking the hot water out of the ground and putting it through radiators. In addition, the areas where the water is really hot are prime locations for geothermal electricity plants, where not water but steam comes out of the ground under pressure and turns turbines to produce electricity. 

#3 Aurora Borealis

You can’t visit Iceland and not at least try and see the Northern Lights, and I must emphasis the word TRY. Know that the chance of seeing the Northern Lights is very luck based, depending heavily on among other things, the weather. Also bear in mind that a camera on a tripod with a long exposure will capture more than you can see with the naked eye. That being said, you cannot visit Iceland and not go hunting for the lights. 

#4 The food

If you know anyone who knows anyone who has gone to Iceland, you will have heard that it is expensive. And while that is true if you’re looking for a cheap holiday, you do not have to spend much more to enjoy really high class food. Also, because of the high level of tourism, lots of dietary requirements are catered for, and my partner and I had no trouble finding food that was gluten free or vegetarian. 

#5 Whale watching

As with the Northern Lights, you cannot visit Iceland and not try and go hunting for whales (strictly with your camera). There are a few companies that do whale watching excursions every day. As with the lights there’s a lot of luck involved, but we did manage to see some beautiful Ocean wildlife, even if it was the wrong time of year for the giant blue whales.

#6 Blue Lagoon and other hot springs

The Blue Lagoon is probably one of the most famous attractions in Iceland, and before going we had heard mixed reviews. On one hand it is expensive and has a lot of marketing hype, on the other it is an incredibly relaxing experience.

The Blue Lagoon itself is a happy accident, as the original structure there is a geothermal power plant. The steam from the ground powers the plant and when condensed back into (still warm) water, was piped out and back into the ground where it ran down through the porous volcanic rock. Due to the nature of the water and the minerals in it, the holes in the rock began to fill up, like limescale in the pipes, and warm mineral rich pools began to form. This became the Blue Lagoon spa. 

The experience was incredibly relaxing and we left feeling completely at ease and body and soul regenerated, and thankfully with no pictures of me with a silica face mask on. 

#7 The fact you can make it your own

Iceland is a country whose main attraction is it’s natural beauty. If you’re looking for a holiday where you can enjoy good food and relax, then a hotel in Reykjavik and a trip to the thermal spas is blissful. Or if you want a holiday filled with adventure then you can fly to Iceland and hire a car yourself, visit the less frequented hot springs, see the waterfalls that the tourists miss, and hunt for the Northern Lights. Iceland offers you the opportunity to experience it your way, and we will certainly be back chasing another different experience. 

Scrapyard in the sky and dealing with scope creep

Having successfully separated the body from the skate, I took this milestone, rewarded myself with a cookie and had a quiet five minutes. I spent the next couple of weeks clearing some jobs around the house, removing any last bits that I might need, generally tidying and organising the garage space ready for the next stage and pottering about the car.

The last of the fuel was removed with some slight creativity, and the fuel tank promptly followed. The vin number and plate were removed from the firewall officially turning the body from “a car” into “scrap metal”, another moment that gave me a small lump in my throat. 

In the meantime, the hotel where my daughters swimming class is held happened to be hosting the Basingstoke comicon where we were lucky enough to spot Jason Momoa’s electric Rolls Royce Phanton II. If you haven’t heard of it then have a quick Google, while it’s probably not qualified to carry the ‘kit’ car handle,  it’s a cool piece of engineering nonetheless. 

Next came booking in the local scrapyard to come and collect the body, with a reasonable cost of £50 to pick it up. Turns out that the transporter had a crane, meaning that I could drop the body back on to the skate, roll it to the end of the drive and then we could use the crane to lift it straight off and onto the back of the loader. No enigne crane required and the skate rolled back into the garage. While a reasonably cool way to go, it still makes me a little sad sending more of the machine to the great scrapyard in the sky. All the more reason to do her proud. 

While this was going on, I had realised that at some point in this process I was likely to need a bench vice. You know, the odd stuck bolt needing drilling and tapping, a bit of metal needing to be bent for a bracket, etc. And now you’re thinking “so you bought a vice, why are you telling me?”. Well that’s where the lesson (fun?) of scope creep comes in.

I need a vice —->

  • A vice needs to be mounted to the bench, and my bench is cheap and just has a very thin top laid on a simple metal frame —->
  • maybe I need to reinforce the bench? —->
  • maybe I should build a new proper bench —->
  • make sure it’s nice and sturdy, have a quick google —->
  • makes sense to have a shelf underneath to reinforce it —->
  • with a little more wood you could add a shelf above as well —->
  • it’s a bit weird having a blank wall between the bench and the shelf, I wonder if I could get a pinboard that would fit the gap, or I could adjust my plans to fit the pinboard…

And needing a vice turns into a big order of wood, an afternoon spent in the garage while the car is on the drive waiting to be collected, and ultimately, this…

Stripping the car

First thing to do is take the car apart with the goal of leaving just the bits that are needed for use on the Exocet. These come in two parts. The “skate” which is made of the subframes, suspension and drivetrain (engine, gearbox, diff and prop). And then a big pile of bits to go back on the new body, being very careful not to confuse it with the equally big (if not bigger) pile of bits to go in the bin. 

Bits to remove and keep:

  • Clocks and clock surround
  • Loom and ECU (this is fun!)
  • Pedals
  • Steering column and wheel
  • Some chassis bracing
  • Fuel tank

Bits for the bin/facebay:

  • Body panels and doors
  • Carpets
  • Seats
  • Dash (and radio, centre console, HVAC)
  • Roof
  • ABS (optional)

So not a small task, and as it turns out comes with plenty of challenges along the way… in no particular order;

Draining the fuel tank

I was a little nervous about emptying the fuel using the drain plug as I still had quite a full tank and sloshing fuel into a bucket in an enclosed space seemed too much like tempting fate. Instead to have a bit better control of the process, I unscrewed the vent from the top of the tank (once the roof and carpet were removed) and used a valved hose (that I had for draining motorbike fuel tanks) feeding straight into a petrol container. I may still need to drain the last bit out with the drain plug but this was my preference to drain the majority in a more controlled way. 

Removing the dash

A few issues I had with this:

  • Removing the dash binnacle – once the steering column cover is off it’s just a strong pull
  • Removing the HVAC panel – don’t try and remove the cables at the control end, it’s much easier to pop them off the other end, there’s two that feed through to the left behind the glove box, and one to the right
  • Removing the passenger airbag took a bit of Googling. There are two bolts underneath once you’ve removed the glove box, then trim tools will do the rest
  • There’s an earth connection in the centre behind the HVAC panel and another under the dash on the drivers side
  • The loom routes at the top behind the vents and is held with two pretty inaccessible clips, no idea where the back of these clips are but a bit of brute force broke the clips off 
  • As well as the 2 bolts on either end of the dash, and the 1 in the centre at the top, there are 4 more (2 each side) in the centre behind the blanks or footwell lights. 
  • A couple of lessons learned from others: make sure to unclip the fuse box and OBD2 port

Rear hub nuts

If you have a mk2.5 I believe that in order to remove the rear brake shields (needed to fit the wingstays) you have to remove the hub and therefore the hub nut. Best to do this while there’s some brake or the wheel is on the ground. Firstly I bought a 29mm socket following a brief bit of googling, then found out my rear hub nuts are 32mm so ordered a second one. Then had the issue of having a lengthy breaker bar, but apparently not lengthy enough. The solution to this was the Ryobi impact wrench which when turned up to 11 finished the job nice a quick.

Steering column

Top of the column isn’t too bad, some bolts in the firewall and one bolt behind the rubber gaiter which holds the universal joint brings most of the column inside the cabin away. For the rest, it’s basically a clamp with a bolt and some splines which may or may not be rusty af. Hit it as hard as you need but as gently as you can. 

Engine bay

Make sure to disconnect the clutch lines from the firewall clips (and the brake lines can help manoeuvre stuff around), undo the earth behind the engine, and undo the fuel line. Also in my car the clutch line from the master to the slave is attached to the body at the rear of the engine on the passenger side (next to the earth mentioned above), this needs to be removed but the bolt is under the line so if you need to remove be careful of leaking fluid (and definitely don’t assume it’s a brake line which is already empty and then pour clutch fluid everywhere). 

Subframe bolts

The build guide says that there are 8 bolts in the front subframe and 6 in the rear. Just to help those looking for them (and in particular those who might miss the last two in the front, easily done apparently),  there are 4 nuts and 4 bolts in the front subframe, and 4 nuts and 2 bolts in the rear.

At the front you have

  • two nuts on each side connecting to the threads on the chassis rails
  • one bolt on each side just behind the lower wishbone (easily missed)
  • one bolt at the back of the subframe (this may have already been removed if you have the gearbox undertray)

At the rear it’s harder to miss them but may also harder to remove them:

  • two nuts on each side just below and behind the shock mounting 
  • one bolt on each side right in between these two nuts

I didn’t have too much trouble removing the front ones, they mostly came quietly. However a number of the rear nuts were very challenging to remove. Use plenty of penetrating spray, don’t overdo it if you have a impact wrench (otherwise known as a dac-dac or ugga dugga)  and don’t underestimate the power of a good bit of wire brushing to clean up the threads. As with many parts of this process, patience and a tea break are incredibly useful tools.  

The other challenge with this is, if you jack up the body then undo the subframe bolts the subframes will just fall out. In my case I took one end at a time, jacked up the subframe (either off the engine oil pan at the front or diff at the back), took the wheels off, undid the nuts and bolts, put the props in to support the subframe, put the wheels back on and dropped everything down. Then the body can be lifted off. 

Is an Exocet the best way to deal with rust?

How do you deal with rust? 

So we’ve established that I love MX5s and I love my MX5s in particular. While not obvious purely from what I’ve written so far, I have never yet sold a car, a record I don’t intend to break starting with Kayleigh. We also know that the poor old MK2.5 model MX5 of mine cannot keep on without some significant intervention which brings us to the choice, do I:

  1. Learn to weld, deal with the many rust issues and continue to deal with them for the foreseeable future, thus saving my poor vehicle for as long as possible from the great scrapyard in the sky. 
  2. Ditch the rusty bits altogether and do something altogether more ambitious, expensive but perhaps ultimately… fun?

Believe it or not, the choice between these was made using a practical argument – while the car has been roadworthy the last couple of years, due to the existence of the orange MX5 it has barely been used. I don’t want to lovingly maintain and restore the car just for her to sit in a garage developing the next rusty piece of restoration work for me. The alternative, at worst will give me something to occupy my time for a while, hopefully with a sense of achievement attached, and at best, a fun car that can be used in a completely different way to the orange Mk4. Okay, maybe not completely different. 

Enter the MEV Exocet, a tubular frame chassis with some fibreglass bodywork that will reduce the weight of the car by a significant amount, reduce the practicality to basically zero and hopefully be a bit of a riot to drive. The overall process is to remove the mx5 body leaving just the suspension, engine, gearbox and differential joined together in order to drop the new body over the top. Simples…

So, next step was a trip to KitFest to have a chat with Stewart who builds the kit cars, ask him many many many many many questions (sorry Stewart), and a few days later, having selected from a smattering of options, put down the deposit for a kit to start production. Not sure of the current lead times but I would anticipate picking it up in a couple of months time.

And, here we are, working on removing everything from a car that technically hasn’t yet failed it’s MOT (because it hasn’t had one) with some potential rust issues being slowly (but hopefully not too slowly) dismantled. My ultimate goal just to give this car a new lease of life, whatever that may be.